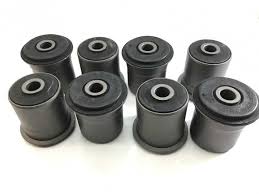
When to change arm bushing in your car and how to do it is very important to avoid car disgrace on the road. A suspension bush is a rubber part that is fitted between most suspension parts. They ensure that there is no metal-to-metal contact between the parts it holds. It, moreover, controls the amount of movement between parts. Suspension bushes, sometimes called wishbone bushes, are small parts that are key to the safety of your car, steering, and handling.
The suspension bushes, therefore, have a very important role to play in making sure that your car drives smoothly. They will help dampen the impact of uneven road surfaces on the suspension. On top of that, they will filter out any vibrations or road noise in the process. The bushes also help keep your car stable when you change direction or accelerate or brake.
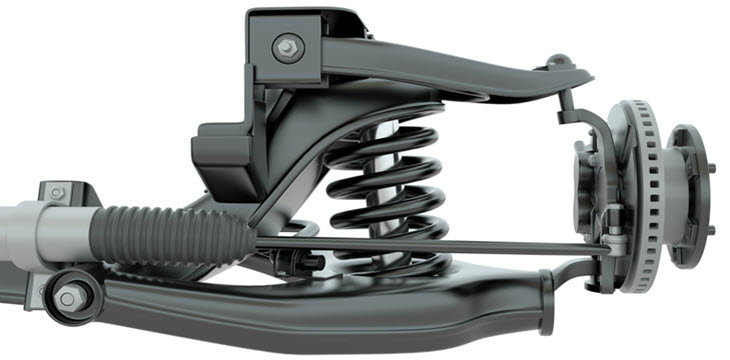
Suspension bushes are located anywhere on the suspension where one suspension part joins another part. Parts like a suspension control arm, wishbone or trailing arm all have one or more bushes. A specific type of bush called the ball joint can be found in the steering system.
Symptoms of a Bad Arm Bushing
Reduced Responsiveness in Steering
Steering problems are among the indicators of not correctly working control arm bushing. The steering can lose some responsiveness.
At high speeds, the vehicle can even “wander” or turn primitively. While driving, you will feel
. The vehicle can lean to a certain degree on sharp turns.
Wobbling Wheels
A bad arms control bushing affects smooth driving. One of the reasons why it was made is to absorb some shock thus facilitating a smooth ride.
The bad one will not achieve this goal but instead will cause some annoyance and disturb your comfort while driving.
You will not be comfortable when turning or reversing and you hear a bad sound. Yes, you will wonder if you are damaging something and you will not be comfortable.
The Braking System
At the moment you see that your brakes are now sharper than it used to be, the first thing to do is to attribute the scenario to the bad control arm bushing.
When the forward and backward vibration of the control arm is not present during the application of brakes, the vehicle will brake suddenly.
Backward Movement When Accelerating
If there is a backward movement in the rear end of the vehicle on acceleration, consider checking the control arm bushing. When accelerating or turning slowly, the steering begins to shake, and a tug is observed.
Tire Wearing
If your vehicle is suffering from bad control arm bushing, the effect is uncompromising. Definitely the wheel will also suffer from wheel miss-alignment, and this causes uneven wear and tire wears either inside or outside even both sides.
How to Replace Arm Bushing
The steps involved in bushing replacement are relatively easy to master and can usually be completed under an hour once you complete equipment. However, the first time you repair the bushings on your car, the steps can take several hours to complete. Therefore, it is best to repeat the steps so as to master
Before you get started, set aside all of the parts and tools that you will need to complete this task.
1. Get Ready Bushing Replacement Tools
In order to complete a bushing replacement, you will need to have the following tool on hand:
- An open-end wrench
- A flat head screwdriver
- A torque wrench
- A floor jack
- Two jack stands
- Clamps
To protect against the possibility of fluid loss from the truck when you have the vehicle suspended, it might be necessary to have a receptacle on hand.
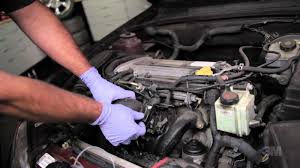
2. Lower the Suspension
In order to access the suspension bushings, you will have to remove the rear suspension assembly. If the rear suspension on your car is independent, the two sides can each be taken off separately. To elevate the car, raise the rear with a jack and secure the vehicle in suspension with jack stands.
Along the rear suspension, take off the shock absorbers and bolts. This will allow you to lower the rear suspension. Disconnect the rear brake lines if necessary.
3. Disengage the Rear Bushing Assembly
With the suspension out of the way, take off the part of the assembly that contains the suspension bushing. Each side will have one or more of these components. Loosen and remove the center bolt to remove the assembly.
4. Clamp the Bushing Assembly
With the suspension bushing assembly removed from the car, bring it into your garage and set it on a table. In order to keep the assembly held in place as you remove the bushings, use either a vice or two clamps.
5. Remove the Old Suspension Bushing
With the bushing assembly firmly secured to the table or workbench, use a screwdriver to force out the old bushing from the assembly.
6. Lubricate the Suspension Parts
Before you apply a new bushing, lubricate the suspension parts. Coat all the parts that will be touching one another in the assembly. The lubrication is necessary to ensure the friction less movement of the parts in contact with each other. Only with lubrication will the rubber remain in ample condition and the metal parts be spared the corrosive effects of movement and contact. Read more: 10 Basic Car Repairs Everyone Should Know
Lubrication must be amply applied, as this will keep the parts moving smoothly and free of noise. Without lubrication, all of these steps would likely be for naught.
7. Reassemble the Suspension Bushing Assembly
With lubrication liberally applied to all the touching parts, put the pieces of the bushing assembly back together. Put the new bushings in place and reapply the nuts and washers.
8. Re-attach the Bushing Assembly to the Vehicle’s Rear Suspension
Reattach the bushing assembly to the rear suspension of the car. This involves reversing the steps that disengaged the assembly from the vehicle. As you fit the washers, make sure that everything is reassembled in the proper order.
With all the parts secure and fastened, torque the bolt according to the specs of your truck. Repeat these steps along the other side if necessary.
Remove the jack stands and lower the car to the ground. Take the car for a test drive and enjoy the newly enhanced performance. If the prior performance issues — noises, tremors, etc. — are now gone, congratulations! You have successfully completed your first change of car bushings.
Read more:12 Tips to Care for Your Car For Long Lasting