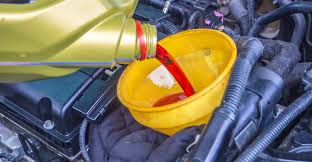
Tips on Lawn Mower fuel filter; If your lawn mower is older than 5-7 years, then it may be time to replace the fuel filter. A clogged or dirty filter can cause an engine malfunction and even a fire. In this post, we will show you how to change a lawn mower fuel filter.
Step 1
- Remove the fuel cap.
- Remove the old filter.
- Clean the area around your new replacement filter, if applicable.
- Snap in your new replacement filter and replace any other removed parts as needed before you put everything back together again!
Step 2
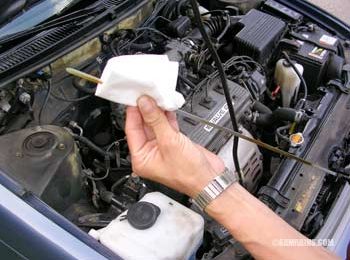
Remove the fuel cap from your lawn mower. This is not a difficult task, but should be done carefully to avoid spillage and messes.
Step 2: Unscrew the fuel filter on your lawnmower. The filter is usually found under the seat or near where you place your feet when using the mower. Some models have a separate compartment for this part of the engine; others have it integrated into other parts of the machine’s frame.
Step 3: Clean off any debris caught in your new filter with a clean cloth or rag before replacing it in its proper place on top of your engine’s housing (often referred to as its “top”). You may also want to use some water if there are some stubborn bits stuck on there – just make sure not too much gets inside where it could potentially cause problems later on!
Step 3
After checking for leaks, you can reinstall the fuel filter.
Step 4
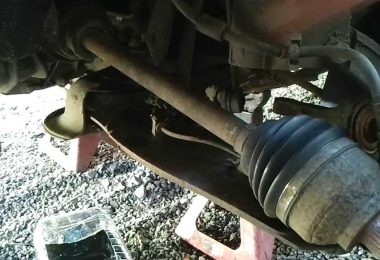
- Check the fuel filter. This is a round or square container that is attached to the engine’s fuel line, and it catches debris before it hits your carburetor. If you find that your mower has a clogged or dirty filter, remove it and clean it with a soft brush (or even an old toothbrush). Be sure to replace the filter with an identical new part if you need one.
- Change the fuel lines. Fuel lines are small tubes that run from the gas tank through various other parts of your mower until they reach your carburetor—and they can also get clogged with dirt over time, causing issues like poor performance and fuel leaks in some cases. To avoid these problems, pull out both ends of each line from their respective places on either side of your engine block so you can see what’s inside them: if there’s nothing in there but air bubbles or very little dirt/dust build up at all then leave well enough alone; if however there is noticeable residue (like oil) then either replace these lines entirely or thoroughly clean them off first using hot soapy water followed by compressed air until no more residue comes out when squeezed gently between two fingers
Step 5
- It’s time to replace the fuel filter. Before you do, check the fuel filter for damage and replace it if necessary.
- With the new fuel filter in hand, make sure you have some gloves on as well as eye protection (I recommend sunglasses) so that you can protect yourself from any potential leaks or spills that may occur during this process.
Replace lawn mower fuel filter
- Replace the fuel filter.
- Clean out the fuel tank.
- Check the spark plug for signs of wear or damage, such as a black buildup or cracked porcelain. If you find any damage, replace it with a new one of the same type.
- Check your air filter for dirt and debris by removing it from its housing and gently blowing through it to clear any particles that may have accumulated there (usually located just above where gas enters). Then replace your air filter if needed using a new one of the same size as before (usually found in hardware stores). This will help ensure that your lawnmower runs efficiently and won’t run out of power easily!
- Inspect all fuel lines for leaks or other issues that could cause problems down the line, if you see anything like this I’d recommend having them replaced since they’re pretty inexpensive anyway so why bother risking something bad happening later on? In addition make sure there are no cracks in these hoses because those could lead to leaks too; again replacing them now would save some money down road! As long as everything looks okay then check around cables/wires connected near carburetors area – anything loose should be re-tightened before starting engine again or else risk damaging these parts which could lead us back here today talking about how expensive things can get when not taken care properly!” Read More: How Much Does Fuel Filter Replacement Cost
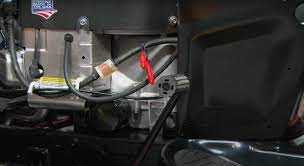
Check your mower owner’s manual to see if your particular model has a built-in or external filter.
Next, check your mower owner’s manual to see if your particular model has a built-in or external filter. Most modern gasoline-powered mowers have an internal fuel filter that requires maintenance only when the engine is being serviced. These filters are usually more expensive than external ones and can be more difficult to change because they’re integrated into the engine block. External filters are usually cheaper and easier to operate, so if you’re regularly working on your lawnmower or don’t mind doing some minor tinkering at home, this may be the better option for you.
A built-in filter is usually found inside the gas tank and typically lasts longer than an external one — up to 100 hours of use.
A built-in filter is usually found inside the gas tank and typically lasts longer than an external one — up to 100 hours of use. The internal filter is easier to access and more convenient because you can simply remove the cap from your lawn mower’s fuel tank and drain any accumulated water, dirt or debris through its built-in opening. These filters also tend to be more durable, since they’re surrounded by metal, which makes them less prone to breakage than an external model. In addition, some models of built-in filters can be cleaned and reused multiple times before they need replacement.
If you have an external filter, you’ll need to replace it periodically.
If you have an external fuel filter, it will need to be replaced periodically. This is a job that can be done by the user and does not require any special tools. The frequency of filter replacement depends on the manufacturer’s recommendations and conditions such as how much your lawn mower is used, where and when you use it (e.g., in dusty or damp environments), etc.
If you’re unsure how often to check your fuel filter, look at your maintenance schedule in the owner’s manual or ask at your local hardware store.
If you’re unsure how often to check your fuel filter, look at your maintenance schedule in the owner’s manual or ask at your local hardware store. Some lawn mowers require that you change the oil every 10 hours of use, while others only require it every 25 hours of use. You should also check the air filter after each time you mow.
Inspect your mower’s fuel lines periodically for cracks, rips or other damage, too.
You should also inspect your lawn mower’s fuel lines from time to time. The line that carries gas from the tank to the engine is made of rubber, which can develop cracks or rips if it’s old. If you find any damage in these lines, repair them right away before they cause problems with your lawn mower.
Replace the lines if you find any problems.
If you find any problems with your fuel lines, it’s time for a replacement. Your current fuel lines should be replaced if:
- They are more than 3 years old
- They are leaking
- They are cracked or broken
- The fittings have been bent or kinked
The easiest way to ensure that your new lines will fit properly is by replacing them with the same brand as the original equipment manufacturer (OEM). If you can’t find OEM replacements, consider using rubber hose couplings instead of metal clamps because they make installation easier without compromising performance.
If you maintain your lawn mower regularly, then it will work better for a longer time.
- Mower maintenance is important
- It will save you time and money in the long run
- It will also help the environment
Conclusion
Replacing the filter is an easy task that can be done in five steps. First, remove the cap from the tank and empty it. Second, remove the old filter and replace it with a new one. Thirdly, fill up the tank with new gasoline and replace the cap securely before using again.