How to paint plastic car parts is a focus point in this article. Paint is an easy way to give your car’s plastic parts new life. The key is to properly prep the plastic before applying a coat of paint. Since paint will not adhere well to dirty or greasy surfaces, it’s important that you clean, dry and lightly sand the surface before beginning your project.
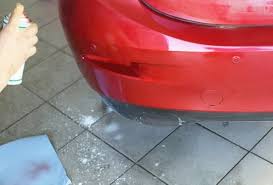
First, clean the plastic parts with warm soapy water, and then dry them thoroughly.
First, clean the plastic parts with warm soapy water, then dry them thoroughly. Use a soft cloth and warm water to remove any dirt or grease from the surface of the parts. A mild soap can be used if necessary but shouldn’t be left on for too long; it may leave a residue that interferes with adhesion later in the process. After cleaning, rinse thoroughly with clean water and dry completely before painting.
Next, prepare your paint supplies:
Then rub the parts down with a lint-free cloth and some rubbing alcohol to remove any grease or other dirt.
- To get started, you’ll want to clean the plastic parts with a lint-free cloth and some rubbing alcohol. This will remove any grease or other dirt that may be on the part, allowing for better paint adhesion later on. You can also use alcohol wipes or a magic eraser for this step if you’d like, but I prefer using a small amount of alcohol and a small amount of rubbing alcohol instead—it’s less messy and more effective than sprays!
- After cleaning the parts with your chosen cleaning material (lint-free cloths usually work best), let them dry for about 15 minutes before moving on to painting them with primer spray paint.
It’s very important that you are in a well-ventilated area when applying paint to plastic.
It’s very important that you are in a well-ventilated area when applying paint to plastic. Paint fumes can be harmful to your lungs and eyes, so it’s essential that you take precautions while working with them.
For example, you may want to wear a mask when painting parts or spraying a car with primer. The mask is designed specifically for protecting the wearer’s lungs from any toxic fumes coming out of the spray gun or air compressor. If possible, you should also try blowing off any overspray from your workbench before working with it again on another project.
Properly cleaning plastic car parts is the most important part of painting them.
- Cleaning plastic car parts properly is the most important part of painting them.
- It’s a good idea to wash your plastic parts before painting them. If they’re dusty or dirty, you can use a water-based cleaner to remove dirt and debris from the surface.
- Dry off the cleaning solution completely with a towel before proceeding with the next steps in this process. This will help prevent dust from sticking to your vehicle once you begin applying paint and primer later on—and also make sure that nothing sticks to your paint job later down the road!
Be sure that you’re working in a well-ventilated area; many paints have harsh fumes that are toxic when inhaled or ingested by humans or pets, so it’s important to keep everyone safe while doing this work outside if possible (or at least open windows). Also make sure not touch any surfaces within 24 hours after painting because it could cause damage over time due to finger prints etc., so try using gloves instead if possible!
Additionally, painting plastic is not as simple as dumping paint on and drying it. You need to do some prep work first, or else the paint will just peel off in large chunks. Follow these steps for a smooth finish:
Lightly sand the plastic surface with 400-grit wet/dry sandpaper. Clean the surface thoroughly with soap and water, and dry it with a soft cloth.
Next, lightly sand the plastic surface with 400-grit wet/dry sandpaper. Clean the surface thoroughly with soap and water, and dry it with a soft cloth.
Give the plastic a coat of primer after sanding, using a paintbrush. Allow the primer to dry for at least 15 minutes before moving on to painting.
Primer is a liquid that’s applied to the plastic with a brush, and it helps the paint stick to plastic. It comes in many colors, but you’ll want to use white or gray primer for your project if you’re painting a dark color over light-colored plastic. Read Also : Advantages of Painting Plastic Car Parts
You’ll want to apply two coats of primer after sanding your parts with sandpaper. Allow each coat of primer to dry completely before moving on—15 minutes should be enough time for one side of each part.
Apply a thin coat of paint, keeping the coat uniform. Allow that coat to dry for 1 to 2 hours.
The most common mistake people make when painting plastic car parts is applying too much paint. To avoid this, keep your brush moving and use a thin coat of paint. It’s important to allow each layer to dry before you apply the next, so don’t rush through the process!
You should also be sure not to put too much pressure on your brush or you’ll get uneven coverage and possibly leave brush marks in your work.
Don’t paint over a wet coat, either—this creates bubbles that are difficult and time-consuming to remove later on down the road (and if it happens after you’ve finished painting, there’s no going back).
Apply another thin coat of paint, again keeping the coat uniform. Allow the paint to dry for 1 to 2 hours.
Allow the paint to dry for 1 to 2 hours, then apply another thin coat of paint. Again, keep the coat uniform and allow it to dry completely before applying another coat. Repeat this process until you have applied a total of 5 coats of paint, allowing each one to dry completely before applying the next one.
You need more than just paint if you want your car parts to look good!
It’s important to know that the paint alone is not enough when painting plastic. You also need primer and thinner, along with a steady hand and good technique. Read Also : Cost of Painting Plastic Car Parts
The best way to ensure that your car parts look good is by applying a thin coat of primer first. This will help ensure even coverage, as well as provide some protection against rusting while you’re painting. Next, apply two coats of colored paint (or one thick coat if you want an opaque finish). Allow each coat to dry completely before adding another layer—this should be done at least 24 hours apart for best results.
Conclusion
It’s important to remember that you need more than just paint if you want your car parts to look good! Paint is only one part of the equation. You also need primer and clear coat, which are designed specifically for plastic surfaces. These products help protect against chipping and fading, so they’re worth investing in if you want results that last long term. We hope this blog post has helped answer some questions about how to paint plastic car parts; feel free to let us know what other topics we should cover next time! Now that you know how to paint plastic car parts, it’s time to get started! Remember, painting your car is a great way to personalize it and make it stand out from the crowd.